
Windows cannot start this hardware device because its configuration information (in the registry) is incomplete or damaged. To fix this problem you can first try running a Troubleshooting Wizard. If that does not work, you should uninstall and then reinstall the hardware device. (Code 19)
Resolutions:
A registry problem was detected.
This can occur when more than one service is defined for a device, if there is a failure opening the service subkey, or if the driver name cannot be obtained from the service subkey. Here are some things that you can try to resolve this problem.
Uninstall and reinstall the driver
Uninstall the driver from Device Manager and scan for new hardware to install the driver again.
You may be prompted to provide the path of the driver. Windows may have the driver built-in, or may still have the driver files installed from the last time that you set up the device. However, sometimes, it will open the New Hardware Wizard which may ask for the driver. If you are asked for the driver and you do not have it, you can try to download the latest driver from the hardware vendor’s Web site.
1. On the device Properties dialog box, click the Driver tab, and then click Uninstall. Follow the instructions.
2. Restart your computer.
3. Open Device Manager, click Action, and then click Scan for hardware changes. Follow the instructions.
Revert to the most recent successful registry configuration
This content is designed for an advanced computer user.
The Last Known Good Configuration feature is a recovery option that you can use to start your computer by using the most recent settings that worked. The Last Known Good Configuration feature restores all the registry information and driver settings that were in effect the last time that the computer started successfully.
Edit the registry
This content is designed for an advanced computer user.
As a last resort, you can edit the registry directly. For more information, see the Registry Reference at the following Microsoft Web site:
http://technet.microsoft.com/en-us/library/cc939136.aspx
Recommended resolution:
Drivertuner is designed to be a utility that anyone can use, no matter their computer skill level. Because of this, in interface and functionality may seem overly simply to more advanced users who are accustomed to dealing directly with drivers within Windows. The program was designed with novice users in mind, and it seems to be effective for people seeking basic functionality and it will handle big stuff while you are busy doing other things.
Key features:
Excellent Ability to Fix Driver Issues
Are you annoyed with missing, outdated, or corrupted drivers? DriverTuner can help you fix driver issues to keep your PC in a healthy state in just a few minutes! The quicker you get DriverTuner, the sooner your driver troubles will be gone!
Powerful Ability to Download Up-to-Date Drivers & Maximize PC Performance
Can’t play the latest games? DriverTuner can help you update the old drivers with the latest drivers for your computer and increase the ease at which you can run the latest CPU-intensive software such as games. It will boost your PC and maximize your PC performance!
Easy-to-Use
DriverTuner excels in its easy-to-use interface. Any driver issues can be fixed with a few clicks of your mouse. It is easy enough for computer novices to figure out in a flash.
Comprehensive Driver Database
Based on a huge and comprehensive database of more than 5,000,000 driver entries, DriverTuner™ supports drivers for almost all major computer hardware and device manufacturers such as Dell, HP, Lenovo, Samsung, Toshiba, ASUS, Nvidia, Intel, Realtek, Brother, EPSON, Compaq, Gateway, and so on.
Wide System Compatibility
DriverTuner™ is compatible with all versions of Windows operating systems such as Windows 8, Windows 7, XP, Vista, 2000, 2003, 2008, 32 and 64 bit.
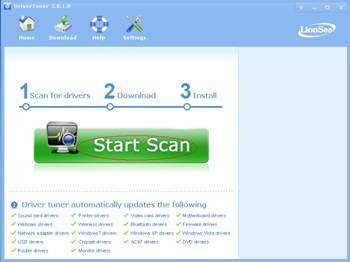
Step1. Click the button [Start Scan] to scan for the drivers.
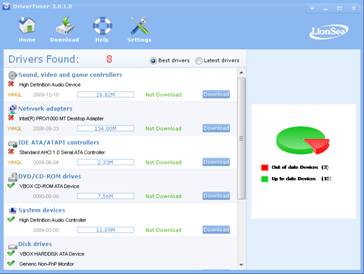
Step2.Browse and choose the drivers you want to fix or update, and then click the button [Download] to download the drivers.
Step3. Install the downloaded drivers.
You can get more information here: www.drivertuner.com